










How to Change the Chain on Your Chainsaw with an Oregon Chain
Posted by Power Tool Replacement Parts on Jul 14th 2026
A sharp, properly installed chainsaw chain is essential for safe operation, clean cuts and extending the life of your saw. Whether you're replacing a worn-out chain after years of use or upgrading to a new Oregon chain, learning how to change your chainsaw chain is a simple maintenance task that every chainsaw owner should know.
In this guide, we'll walk you through the process of replacing your chainsaw chain with an Oregon chain, along with a few maintenance tips to keep your saw cutting like new.
When Should You Replace Your Chainsaw Chain?
Chainsaw chains naturally wear over time, even with proper sharpening and maintenance. While sharpening can restore a dull cutting edge multiple times, every chain eventually reaches the end of its life.
Some common signs it's time to replace your chain include:
- The cutters have become too short from repeated sharpening.
- The chain has broken or has damaged drive links.
- The chain stretches excessively and no longer adjusts properly.
- Cutting performance remains poor even after sharpening.
Installing a quality Oregon replacement chain can restore your chainsaw's cutting performance and help reduce strain on the engine.
Before You Begin
Before replacing your chain, gather the following:
- A replacement Oregon chainsaw chain that matches your saw's specifications
- A wrench that fits your chainsaw
- Protective gloves
- Safety glasses
- A clean rag for wiping away sawdust and debris
Always turn the chainsaw off, disconnect the spark plug wire on gas-powered models (or remove the battery on cordless models), and allow the saw to cool before performing maintenance.
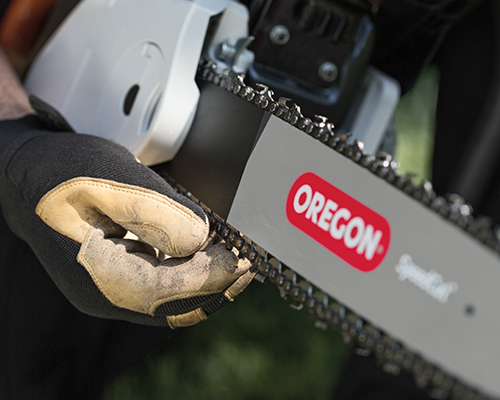
Step 1: Loosen the Side Cover
Using your wrench, loosen the nuts securing the clutch or side cover.
Once the nuts are loose, remove the cover to expose the guide bar and chain. Be careful not to lose any washers or hardware during removal.
Step 2: Release Chain Tension
Turn the chain tension adjustment screw counterclockwise to move the guide bar inward.
This creates enough slack to easily remove the old chain from the guide bar and drive sprocket.
Step 3: Remove the Old Chain
Carefully lift the chain off the guide bar and then remove it from the drive sprocket.
Take this opportunity to inspect the guide bar for excessive wear, burrs or clogged oil passages. Cleaning the guide bar before installing the new chain can improve lubrication and cutting performance.
Step 4: Install the New Oregon Chain
Place the new Oregon chain around the drive sprocket first.
Next, fit the chain into the guide bar groove while making sure every drive link seats properly inside the groove.
One of the most common installation mistakes is putting the chain on backward.
The cutting teeth along the top of the guide bar should point forward toward the tip of the bar. If they're facing backward, remove the chain and reinstall it correctly.
Step 5: Reinstall the Side Cover
Reinstall the side cover over the guide bar and loosely tighten the bar nuts.
Do not fully tighten them yet since you'll need to adjust the chain tension first.
Step 6: Adjust Chain Tension
Turn the chain tension adjustment screw until the chain fits snugly against the guide bar.
A properly tensioned chain should:
- Stay seated in the guide bar groove.
- Pull away from the bar slightly by hand.
- Snap back into place when released.
- Move freely around the guide bar without binding.
Avoid overtightening the chain, as this increases wear on both the chain and guide bar.
Step 7: Tighten the Guide Bar Nuts
Lift the nose of the guide bar slightly while tightening the guide bar nuts securely.
Holding the bar up during tightening helps maintain proper chain tension once everything is secured.
After tightening, rotate the chain by hand while wearing gloves to ensure it moves smoothly.
Test the Chainsaw
Before tackling any cutting jobs, start the chainsaw and let it idle for a minute.
Watch for proper chain movement and verify that chain oil is reaching the guide bar. After making a few test cuts, stop the saw and check the chain tension again. New chains often stretch slightly during their first few minutes of use and may require a minor adjustment.
Choosing the Correct Oregon Replacement Chain
Not all chainsaw chains are interchangeable. Before purchasing a replacement Oregon chain, verify your saw's:
- Bar length
- Chain pitch
- Chain gauge
- Number of drive links
Many chainsaws display this information directly on the guide bar. Using the correct specifications ensures proper fitment, safe operation and optimal cutting performance.
If you're replacing your chainsaw chain, it's also a great time to inspect other wear items such as guide bars, sprockets, air filters, spark plugs and fuel system components.
At Power Tool Replacement Parts, we carry a wide selection of replacement parts for chainsaws and outdoor power equipment from many of the industry's leading brands. Whether you're performing routine maintenance or repairing a heavily used saw, finding the right replacement parts helps keep your equipment running safely and efficiently.